banner background

mmici21

Wednesday, March 26, 2014

Today's Post brought to you by the Letter F and the color Coral


 When we first decorated our daughter's room she was an infant.  I remember our friend Marlena coming over and holding Finley while Shawn and I painted her room a wonderful, soothing Tiffany blue ... and Finley fussed the entire time.... thankfully Marlena is patient and accepting. 

For accent colors, we used Raspberry, Pale Pink and some lime green in her room originally, and now she wants those colors in her toy room, so we thought we should change things up a little bit in her room so the two rooms weren't matchy matchy. 

I found the color combination of pale blue, coral, grey and white to be a great, calming color combination.  She could still have her same wall color, have that touch of pink that she so loves... and we can begin to transition from a nursery into a girls room without too much of a financial burden. 


Her bed faces a wall that has nothing on it, and her dresser is rather large gorgeous piece from a local furniture store (Boats in Pella).  There is a TV and DVD player on the dresser, but other than that.... nothing much to look at.
 
I laid out my rough idea before having the pieces hung up...


I thought we could put together a small gallery wall for her room.  I was inspired by a framed piece I made with my monthly Stampin Up! club
 
 
 to anchor the wall display - We placed the largest piece in the middle....

 
And built out from there.  I wanted to make sure the coral and whites were balanced when you looked at the wall...  So we mixed in the white with the coral before hanging on the wall...

 
Here is an up close look at the pieces that make up her wall display....


I spray painted the Coral frames with Krylon Coral Isle.  These frames were all different colors at one point or another, black, wooden, gold and I just sprayed them all.  The white frames even were spray painted white,  again, using Krylon Duo Paint and Primer in White.  These frames were all black to start out with. 
 
I am still on the hunt for the perfect item to put in the fun coral frame that is on your right hand side as you look at the photo, any ideas or recommendations?

Tuesday, March 25, 2014

Wash Me! Dry Me! Rugs for our Laundry Room


I think the laundry room needed a little fun added to it, so... I thought a rug in front of the machines would brighten up the joint...


I really liked the Clothespin Rug  Pinterest that is a large rug with 3 clothespins on it,  I even found a template that I could use for the clothespins.... however I wasn't confident on making a large template for that large scale of a project yet. Maybe another time.


I needed another plan though...


I found these super cute rugs at Wal-Mart one day 2 rugs for $3.96 (SAY WHAT?!?!?!?!)


Now.... $3.96 sounds alot better than the $15.00 for the bigger rug.. and then I had the challenge of making a large scale template...
So CHANGE IN PLANS!  
Onto Plan B as they say....
 
So... now I have 2 rugs... what to do... what to do... OH YES!!!! 
I have 1 washer and 1 dryer in there... Wash and Dry baby!!!!
 
So I made templates for each letter using Microsoft Word Art, cut the letters out with my exact-o knife...

 
Laid the letters out on each rug to see spacing and to make sure the words fit on each rug....


I traced the letters onto the rug using a white paint pen/marker that you can purchase at any Wal-Mart or Hobby Store. 
Using a foam paint brush I painted in each letter with white acrylic craft paint. 
I stippled in the crevices with a stiff paint brush. 
This application takes 2-3 coats to get into the fibers.  I need to go over the Dry letters one more time and I think it will look a lot better. 


So now I have my personalized laundry room rugs!  For a very affordable price!!!!
 
If I were to do this project again, I would try to pick rugs out that had only 1 level of texture.  The white lines are raised on these rugs therefore making it more difficult to get the paint into the crevices. 
 
What would you attempt if you knew you would be successful?
 
Try it this week!


Friday, March 21, 2014

Sweet Summer Sangria Recipe


A.) who loves WINE?  - I hear the echos of the answers .....me! me!  me! 
B.) who loves a fun cocktail?  - again... the echoing of the me.. me... me...

Recently I had a group of lovely ladies over to our house for our monthly BUNKO/social time.  I LOVE to host parties and I LOVE this group of ladies!  I really wanted to find a good cocktail/drink for them to enjoy. 

Last summer I came up with a drink recipe for the local winery I work for, and we called it Sweet Summer Sangria, it is made with some great summer fruits, pink lemonade, lemon-lime soda and a wine by the name of Iowa LaCrescent.  The combonation is DELISH!!!!   So smooth and yummy, its a for sure winner recipe when you have some company coming over! 


Here's the pretty picture on the website, plus the link to the drink recipe amongst other recipes I have developed using our wines.  Feel free to try others out as well as this winner!


As you can see... this drink was a hit at a recent BUNKO that was held at our house! 
This was the 2nd pitcher that I made. 
 
Ingredients:1 12-oz can frozen pink lemonade
1 bottle Tassel Ridge 2012 Iowa LaCrescent
12 oz lemon lime soda
2 lemons, sliced
1 cup blueberries
1 cup raspberries
2 cups strawberries, quartered
Directions:
Combine frozen lemonade and lemon lime soda in large pitcher and mix until lemonade is dissolved. Add Tassel Ridge 2012 Iowa LaCrescent, lemons, blueberries, strawberries, and raspberries and stir gently. Refrigerate 12 to 24 hours or overnight to allow fruit flavors to blend with liquid. Makes 8 servings.


A few pictures of the ladies enjoying the evenings girly company, drinks and appetizers. 
What a great group of ladies I am lucky enough to have in my life!  Count me lucky!!!!!!


Happy Friday to you all out there as well!
I hope that you enjoy your days with your friends and family this weekend.
Are any of you planning on making any cocktails and sharing them with your friends? 

Thursday, March 20, 2014

Thriftstore Thursday!

I am super JAZZED about these two finds that I found at our local Oskaloosa Goodwill!!!!!
I spent around $5.00 for both of gems?!?!?!?
This vase was $2.99  while it does have a beautiful pealized sheen to it...
My plan is to paint this entirely all black, and paint 2 chevron white stripes at the top. 
 I have 2 artificial palm branches that I would like to put in this vase for summer decor. 
 
This frame is beyond gorgeous!!!  It just SCREAMS summer!!!!  The bamboo and the teak look to it is just fantastic.   This frame was $1.99 and I snatched it up super fast!!! 
I cannot wait to spray paint this frame a bright fushcia pink...
I have a very fun painting for a canvas to put in there...
 
Think..... "GREASE"  -
 "Oh Those Summer Nights"  or "Summer Lovin"

 
Both of these pieces made me so happy to find  them, they struck a cord with me the moment I saw them.  I had my inspiration the moment I locked my eyes upon them. 
 
Sometimes it's not that easy though... sometimes you think - What would I do with this?  What could I do with this?    - Or what if you just aren't inspired by anything when you go? 
There is just so much stuff, how do I find anything?
 
My advice would be - ask yourself questions... lots of them...
A.) Slow your roll, there is no need to get overwhelmed by everything here.
B.) I always look at the lines of the piece.  I am a fan of straight clean lines. 
If the lines are something that I like or think would go with my home, I then try to think how I could change it, could I paint it?   Could I decopauge it?  etc.
C.) Where would you put this piece?  
D.) Would you be able to use this piece again?  Would your dollar stretch further with it? or is it just kitchy? 
 
When you go to the thrift store,  do you go with a particular item in mind or do you enter with an open mind?
 
What have you bought from your local thrift store recently?
 
 
Are you wanting to try something new? 

Wednesday, March 19, 2014

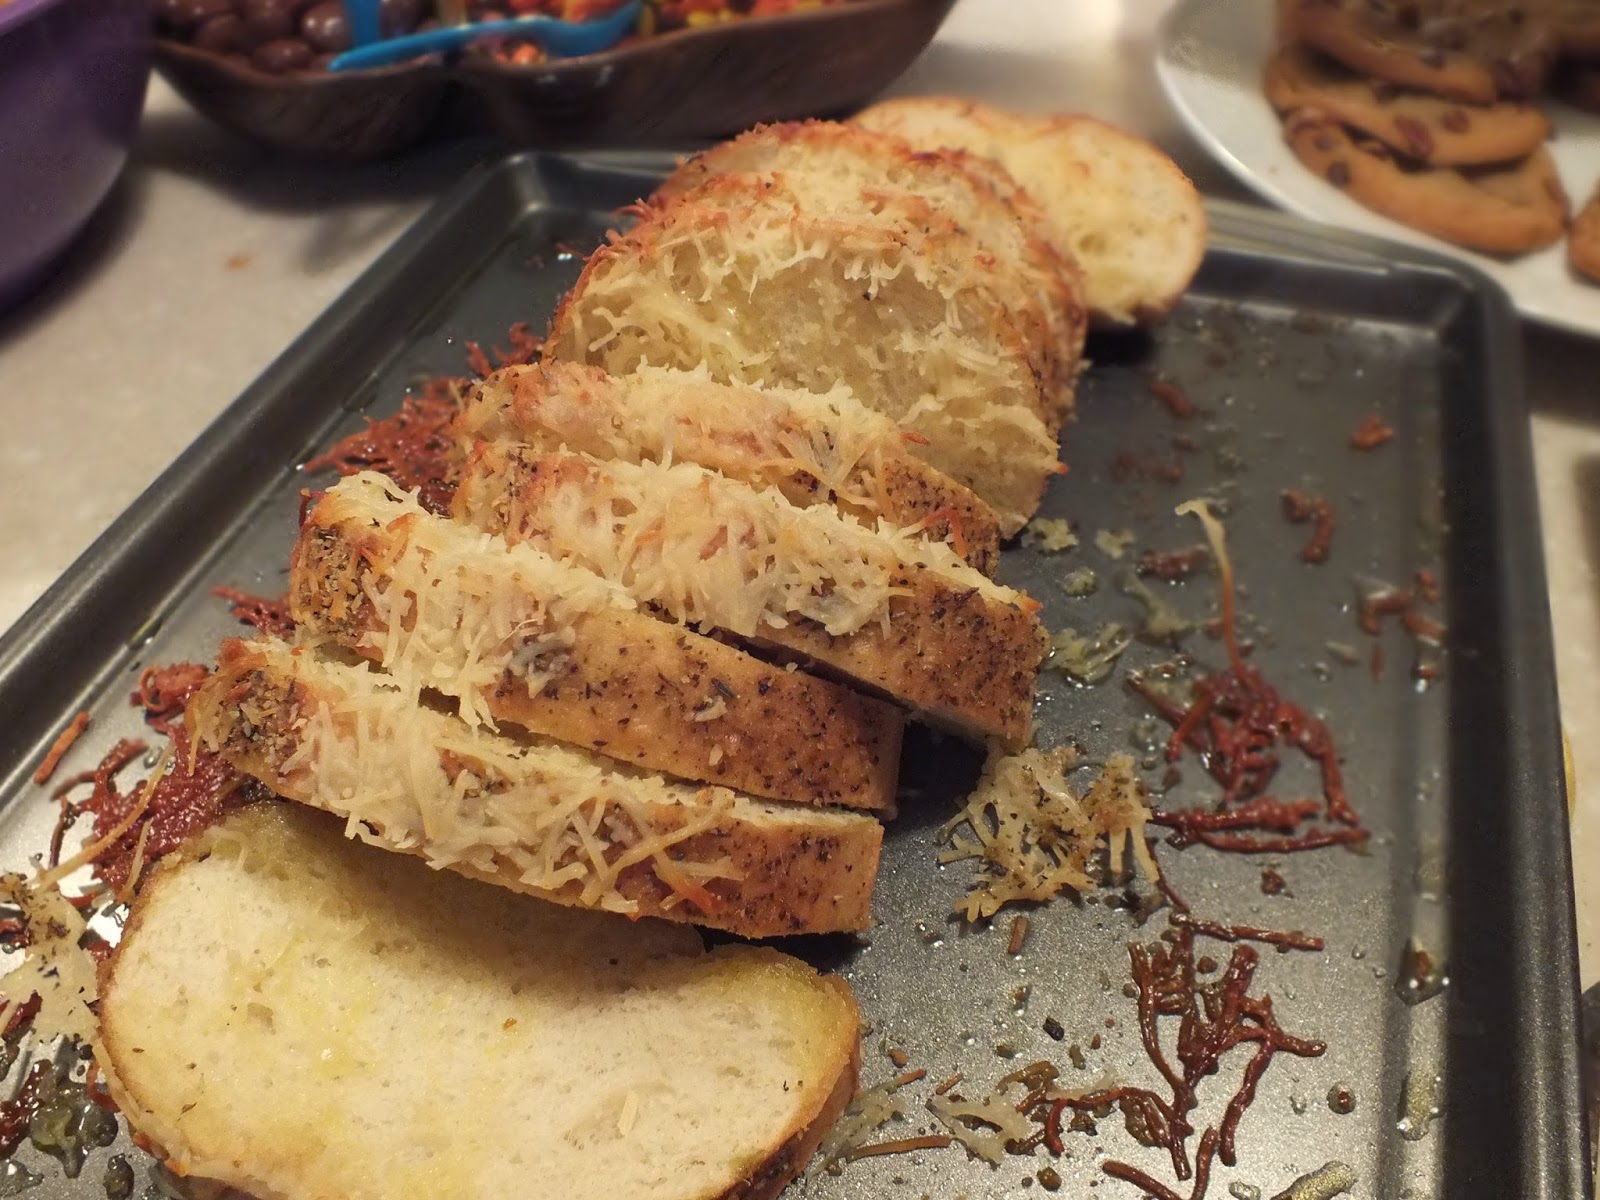
Cheesy Italian Pull Apart Bread Recipe

*********** HAPPY!!!! **************


I feel so happy to type the words cheesey and bread into the same sentence...
I don't know if its the carbs or the delish melty cheese that is doing it for me...
I'm just going to go with both...
A little secret of mine... I am not a lover of bread, I think its the yeast... but I LOVE artisan breads....weird I know

Anywho... I digress...

Easy recipe for entertaining need?  GOT IT!


Ingredients:
-1 loaf of artisan or french loaf from your bakery
-Fresh herbs - grated
-Garlic Powder
(I totally cheated... I bought a loaf that had the garlic and herbs already on it! HA!)
-Olive Oil
-Grated Parmeasan Cheese - I can still say that right?  the European Cheese Congress hasn't banned the use of the word Parmeasan yet, right?


Directions:
Heat oven to 350 degrees.
Slice loaf of bread almost thru the bottom
Pull slices slightly apart - making a "fan" on the cookie sheet.
Pour EVVO over slices of bread, slices do not need to be liberally covered or soaked, but do need some on each slice.
Stuff grated Parmeasan cheese in between each slice and then sprinkle remainder of cheese over the top. Bake in oven for 10-15 minutes, until your bread is the crusty-ness you would like. The cheese will be warm and melty. 
Slice thru the remainder of the loaf.                                                                                   
Serve warm to your guests.

Tuesday, March 18, 2014

Lighthearted Sympathy Gift


A friend and co-worker of mine recently had her Grandma pass away from a battle with Cancer.  Stupid C word...  Her grandma was 90 years old and had enjoyed life.  Still hard to loose a special person like that, even when you have accepted the reality. 

I really wanted to give her a card or something that would express my condolences but would also find a way to bring a smile to her face.  Something light hearted, but still heart felt.

 
Losing your Grandma Really "Sucks" .... Sorry.
 
Let's get this cute little gift put together!
Materials Needed:
1 empty container - I repurposed an oatmeal box
Spray Paint - your choice of color - I used Watermelon from Krylon
1 Foam floral block
Paper - one for the large circle, and one for the sentiment
Cutting tools - I used my Creative Memories Circles
Ribbon
Bamboo Skewer
Glue - I used Elmers Hobby Glue
Suckers


First, lets paint your container - this coverage took about 3 coats to cover up all the wording

 
Insert the floral foam into the container

 
Place suckers in the floral foam - I did all straight rows, kept them tight together

 
Glued ribbbon around the container for a simple embellishment


Cut out the circles - I did 2 of the outer circles in blue - glue them together with the skewer in between. glue the sentiment to the big outer circles. 
 
Insert the skewer into the floral foam.
 
Here's a look at the final gift.


She was thrilled about her gift,  lots of smiles, and a compliments.  She was very pleased with the gift. 
I can only hope that when she thinks of this gift or tastes a sucker that she knows she is thought of.
 
How can you brighten someone's day with a simple gesture?

Thursday, March 13, 2014

How May I serve You? Service Tray put to good use

So remember when I purchased those 2 melamine plates from WalMart to make the stand for our dryer?  Weeeeeeelllll... I may have purchased the tray that matches as well....
I thought that it would help with the corraling of items....


I used Krylon Duo - Paint and Primer in One - In White. This stuff really works folks!  2 applications of this paint, and it covered the bright colorful stripes you see above.  The 2nd coat was just as a pre-caution and it worked like a charm!

Then I spray painted it with Krylon - Bright Idea which is a gorgeously fun daffodilly yellow.  Since we will be painting our laundry room a beautiful grey/blue color I really wanted to accent in yellows and whites, make the room super sunny and fun!

Simple, effective, and practical, all in one location!


I am really loving the tray, the tower and soap, all together.
Such a simple fix that makes an impact!

Have you been inspired this winter/spring to organize an area or room?
If so, what are you doing, would you like to share with the rest of us and empower us with your discoveries?

Have a great day!


Wednesday, March 12, 2014

I wanna Wash and Roll Alllll Night... and Part of everyday...

oh wait... that supposed to be PARTY everyday... shoot... my apologies...

also... your welcome for the wonderful KISS earworm now stuck in your head.... your welcome...

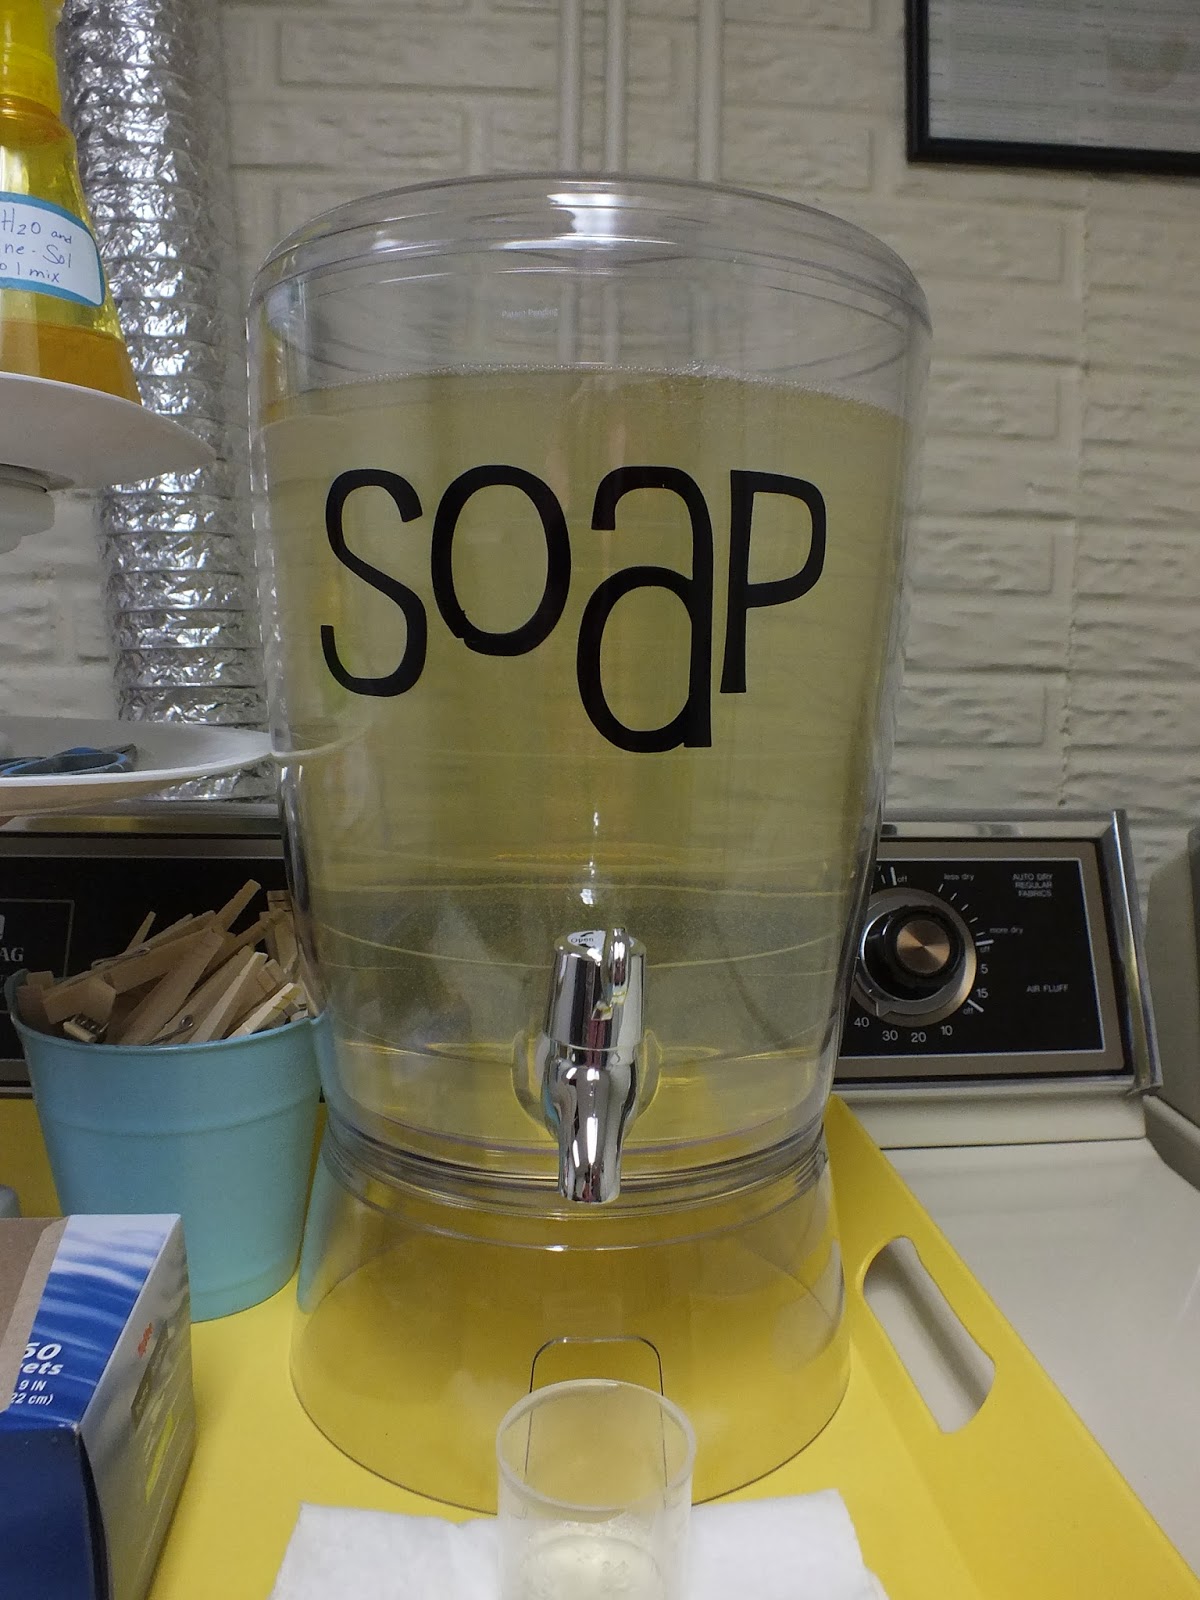
Everyone has laundry soap in their laundry area... we all use it... power or liquid... everyone has their something (my golly today is the day of song lyrics, mercy).  I wanted to dress up my soap container, make it pretty as well as practical...

Let me introduce you to the drink dispenser, found in your local Target or Wal-Mart for around $20.00....
 
I set up the dispenser, the base comes with it and can be removed for easy storage.
This dispenser held was was left of this size container of All, plus two other smaller containers of ALL laundry detergent.
 
Onto the vinyl decal... "SOAP"
 
I used my Cherry Limeade Cricut cartridge, size 3.50"
Cut vinyl - make sure you use the Kiss Setting as to not cut thru the entire material - only want the vinyl lettering to come up, not the white backing.

 
Once the wording has been cut out, remove the excess vinyl, leaving only your lettering on the white backing.  Then apply your transfer sheet as you see below... this will be needed to apply the lettering to your project...


You can see here a full sheet of the black vinyl and the transfer sheet - before the excess black vinyl was removed...  Place it onto your project, making sure your lettering is where you would like it....


Once you have applied your transfer sheet, and vinyl lettering... gently remove the transfer tape at a 90 degree angle, this helps pull everything away slowly... and the letters do not get caught and pulled up/removed.

 
After the letters were shown, I then went back with an exacto knife and removed the inside vinyl (S, O, A, and P)  This picks up and then pulls off very easily... just go slow and at an angle.


Viola!  Soap Dispenser - labeled and super cute!!!!


Tuesday, March 11, 2014

Filled with Hope

I found an quote this past February that I adore - because I can see exactly why it was stated.

"The day the Lord created Hope, was probably the same day he created Spring" {Bern Williams}

Isn't that the truth... mercy... Spring is a season based on Hope... Hope for a great growing season,Hope for opening up the windows and enjoying fresh air, Hope that the winter's "ick and crud" leaves your family, hope that your kids can go outside and wear off their energy.  You get my point...  Spring is full of hope... it's one in the same... 

The word "Hope" has been my inspiration for our Spring Decor... and what better way to showcase that inspiration than the honor of our front door...

 
Keeping the same wonderful teal picture frame that I have used for many a door decor post before...
You can see my other posts here and here.
 
My hope is his simple statement as you walk by or up to our house offers you encouragment, brings a smile to your face... knowing that the opportunity for something better is available.  Have hope!
 
Tutorial on how to make this sweet awesome-sauce door decor!
Using my Cricut I cut out the letters with my Cherry Limeade cartride.
Size 7" letters

Using a Stampin Up banner punch I punched out multiple flags out of scraps of craft papers - many of them I have used elsewhere in the house - on the building blocks in our entryway entryway or in our dining room here
 
Using Elmers Hobby Glue, I then attached all the flags to the black ric rac ribbon that I have been using all over the house this spring for other banners (living room )
 
 
While that is drying, lets get the poster board ready and in our frame....


Measure your frame for the perfect fit, and then again measure your posterboard to ensure a perfect fit.
Cut to the correct size.

 
Here are my other materials for the front... cut letters and Elmer's Craft/Hobby Glue.
 
I glued the letters onto the black poster board using the Elmer's Hobby Glue...
 
 Attached the banner to the frame - no glueing needed... just run the ribbon thru the staples in the back of the frame, tie it off and you are good to go!


Welcome to our home... I hope you have a great time, we love having you over!